Data to Drive the application
So far our component can display a list of tasks for us that we are pre-building using JavaScript, however we want to display tasks related to a particular record ideally which means we need some way of getting our data.
Lightning Standard Controller to the Rescue
In an earlier post I discussed a library I have put together called the “Lightning Standard Controller” to make getting data to and from Apex a bit easier. I am going to be lazy and use this library so we can focus on the Lightning aspect of this work and not the apex piece. This component is also a prime target component for what I intended to use the library for - simple retriving and saving of data.
To do this we are going to make some incremental tweaks to our component. Firstly we are going to add the LightningStandardController to our component and update our tasks attribute to be a list of Task Sobjects:
<aura:component controller="LightningStandardController">
    <aura:handler name="init" value="{!this}" action="{!c.doInit}" />

    <aura:attribute name="newTask" type="Task" default="{ 'sobjectType': 'Task' }"/>
    <aura:attribute name="tasks" type="Task[]"/>
    <aura:iteration items="{!v.tasks}" var="item">
        {!item.Subject}, {!item.ActivityDate}<br/>
    </aura:iteration>

    <force:inputField aura:id="taskSubject" value="{!v.newTask.Subject}"/>
    <force:inputField aura:id="taskDate" value="{!v.newTask.ActivityDate}"/>

    <ui:button label="Add Task" press="{!c.addTask}" />
</aura:component>
Then we need to go and update our loadTasks function to call out to the controller and retrieve the Tasks for a record.
loadTasks : function(component) {
//Create our action referencing the query method on the LightningStandardController
var action = component.get("c.query");
//Set the filter to be a record Id
var filter = { "WhatId " : "0015800000EXq0z" };
//Set our parameters for the query method on the LightningStandardController
action.setParams({ objectType : "Task", fields: ["Subject", "ActivityDate", "WhatId "], and_filters : filter });
//Set a callback function to populate the tasks attribute if we get a successful result
action.setCallback(this, function(response) {
var state = response.getState();
if (state === "SUCCESS") {
component.set("v.tasks", response.getReturnValue());
} else if (state === "ERROR") {
var errors = response.getError();
if (errors) {
if (errors[0] && errors[0].message) {
console.log("Error message: " + errors[0].message);
}
} else {
console.log("Unknown error");
}
}
});
//Queue the action to run
$A.enqueueAction(action);
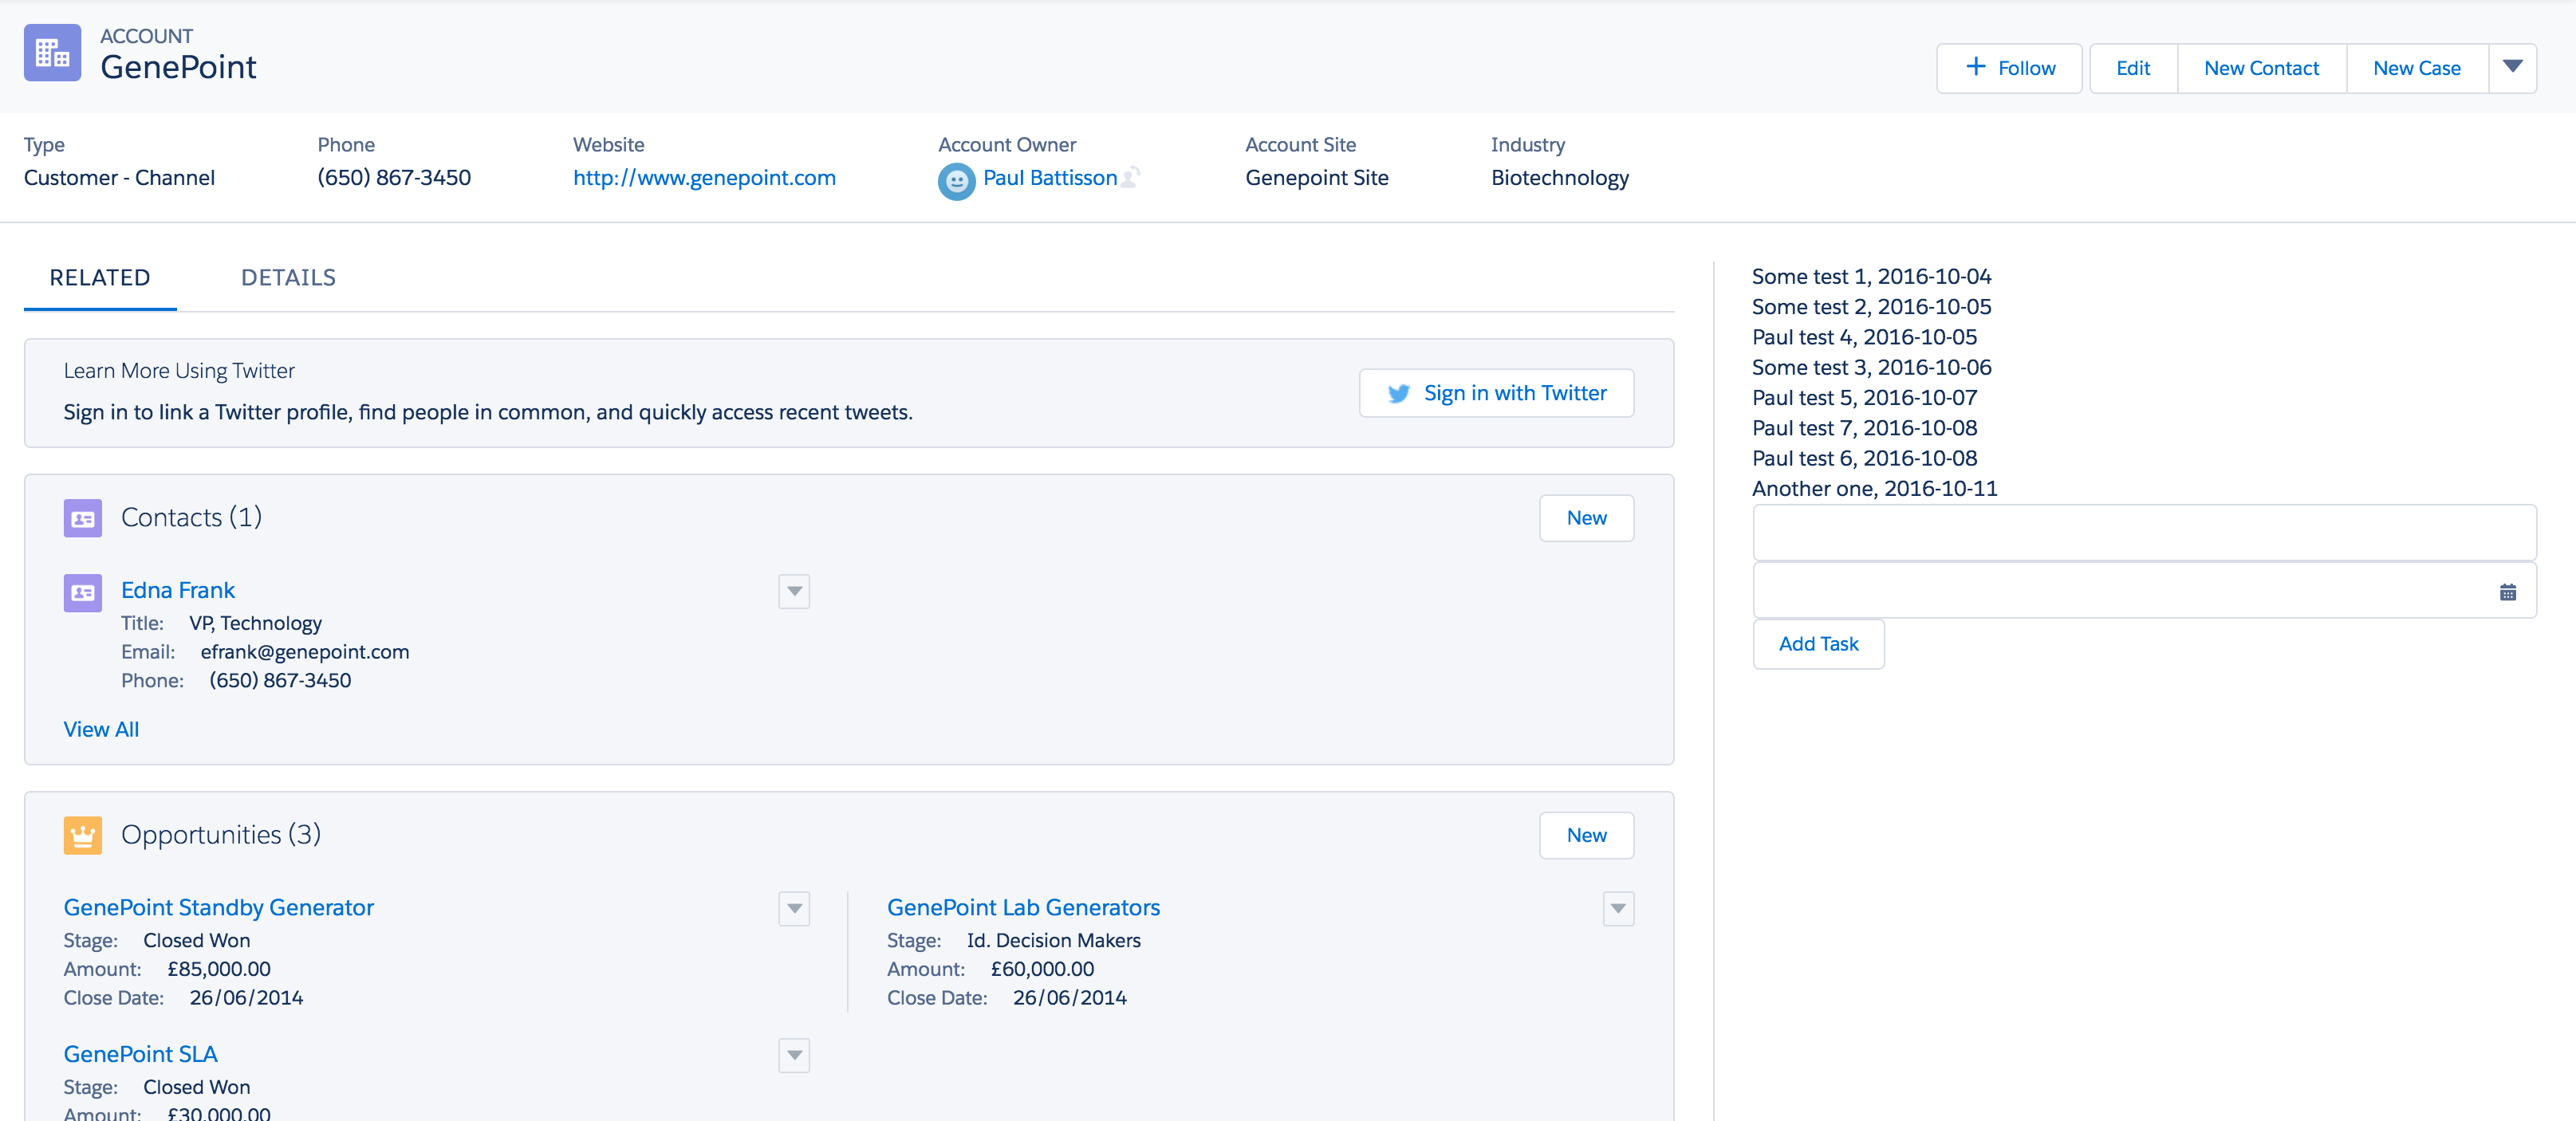
},Note that I am hardcoding the WhatId filter here for now to enable me to do some quick testing. If you set this Id to be the Id of a record with some associated tasks then you can test your component using the demo app from last time and should see a list of the tasks for that record being displayed.
Getting Data Dynamically
We really want to make this component embeddable in the Lightning Experience or Salesforce1 so we have to now tweak our component a little further to make this possible. To do this we need to have our component implement some interfaces:
force:appHostablemarks the component as being usable within Salesforce1flexipage:availableForAllPageTypesindicates that the component can be used within the Lightning App Builderforce:hasRecordIdindicates that when a component is loaded the current record Id should be set on the component’srecordIdattribute
So we need to update our component code to the following.
<aura:component controller="LightningStandardController" implements="force:appHostable,flexipage:availableForAllPageTypes,force:hasRecordId">
    <aura:handler name="init" value="{!this}" action="{!c.doInit}" />

    <aura:attribute name="recordId" type="Id" />
    <aura:attribute name="newTask" type="Task" default="{ 'sobjectType': 'Task' }"/>
    <aura:attribute name="tasks" type="Task[]"/>

    <aura:iteration items="{!v.tasks}" var="item">
        {!item.Subject}, {!item.ActivityDate}<br/>
    </aura:iteration>

    <force:inputField aura:id="taskSubject" value="{!v.newTask.Subject}"/>
    <force:inputField aura:id="taskDate" value="{!v.newTask.ActivityDate}"/>

    <ui:button label="Add Task" press="{!c.addTask}" />
</aura:component>
Here we have added in our interfaces we are implementing and a new attribute called recordId which is going to have our current record Id set on load. With this we can then make a really simple change on our helper to use the recordId attribute to retrieve our values instead.
//Set the filter to be a record Id
var filter = { "WhatId " : component.get("v.recordId") };
You are now able to add this component to a standard page view using the Lightning App Builder! Go ahead and add it to the page layout for the record you previously hardcoded the Id for and when you reload the component will show up on the screen for you, listing out the tasks.
Adding a New Task
The next thing for us to do is get our save method to properly save our new Task. For this we need to ensure we are correctly setting the WhatId value on our newTask object using the recordId parameter.
Our first update is to our doInit function to set the WhatId correctly on our newTask
doInit : function(component, event, helper) {
    helper.loadTasks(component);
    component.set("v.newTask.WhatId", component.get("v.recordId"));
},
This will ensure that we are associating the newly created task to the current record when we create it. The next change is to then make our addTask function actually save the task to the database using our LightningStandardController
addTask : function(component) {
    var items = component.get("v.tasks");

    //Create our action referencing the save method on the LightningStandardController
    var action = component.get("c.save");

    //Set our parameters for the query method on the LightningStandardController
    action.setParams({ objectType : "Task", record : component.get("v.newTask") });

    //Set a callback function to Id of the new task and add it to the list if we get a successful result
    action.setCallback(this, function(response) {
        var state = response.getState();
        if (state === "SUCCESS") {
            component.set("v.newTask.Id", response.getReturnValue());
            items.push(component.get("v.newTask"));
            component.set("v.tasks", items);
            component.set("v.newTask", {'sobjectType': 'Task','Subject': '','ActivityDate': '', 'WhatId': component.get("v.recordId")});
        } else if (state === "ERROR") {
            var errors = response.getError();
            if (errors) {
                if (errors[0] && errors[0].message) {
                    console.log("Error message: " + errors[0].message);
                }
            } else {
                console.log("Unknown error");
            }
        }
    });

    //Queue the action to run
    $A.enqueueAction(action);
}
The majority of this code looks a lot like the loadTasks function, but the things I want to ensure we take note of are the setting of the recordId on the newTask when it is returned from our save method (this will come in handy later for marking the item as complete) along with the fact that we are then adding this record to the existing tasks list by pushing it onto our items array and then setting the tasks list to be this newly updated array. We finally go through and reset the newTask record like we were doing before to add a new task.
Next Time…
In reviewing where we have got to in this post I have decided to end it here and move the “marking as complete” and styling to the next post. We have covered a lot here and I don’t want us to be overwhelmed.
So next time we will go through marking an item as complete and improving the look and feel before we wrap things up with some documentation and other items to make this component more user friendly.